Making Your Own Cultured Butter at Home

You can walk into any high-end grocery store in San Diego and find cultured butter, but it often carries a hefty price tag and a short shelf life. Making your own cultured butter at home allows you to control the fermentation process, the salt content, and the final flavor profile. This process involves culturing heavy cream with specific bacteria before churning it into butter, resulting in a much deeper, tangy complexity than standard unsalted butter. It’s a fundamental skill for anyone wanting to master the art of dairy-based cooking.
Standard butter is simply the fat separated from milk. Cultured butter, however, is a living product. By adding a starter culture to cream and letting it sit, you develop lactic acid and organic compounds that give the butter its signature "funk." It’s the difference between a flat note and a full symphony.
What is the Difference Between Cultured and Sweet Cream Butter?
Cultured butter is made by adding lactic acid bacteria to cream, whereas sweet cream butter is made from unfermented cream. This distinction changes the flavor profile significantly. Sweet cream butter (often called "standard" butter) is mild and neutral, making it a great blank canvas for baking. Cultured butter has a distinct tang and a richer, more complex aroma due to the fermentation process.
If you've ever wondered why some professional bakeries have a specific "taste" to their pastries, it's often the butter. The acidity in cultured butter actually helps strengthen gluten structures in doughs. It provides a subtle brightness that cuts through heavy fats in a dish. It's a small detail, but a massive one.
Here is a quick breakdown of how they stack up:
| Feature | Sweet Cream Butter | Cultured Butter |
|---|---|---|
| Primary Flavor | Mild, creamy, neutral | Tangy, acidic, complex |
| Fermentation | None | Lactic acid fermentation |
| Best Use | Standard baking, general cooking | Sourdough, high-end finishing, spreading |
| Complexity | Low | High |
How Much Does It Cost to Make Cultured Butter at Home?
Making cultured butter at home is incredibly cost-effective, especially if you source high-quality cream in bulk. The main cost is the initial investment in high-fat heavy cream and a starter culture. Most of the "cost" is actually just time and patience.
To get started, you'll need high-quality heavy cream. I recommend looking for a brand like Wonderful Creamery or any local dairy that offers cream with a high fat content (at least 36% or higher). If you can find grass-fed cream, the color will be a beautiful pale yellow due to the beta-carotene. You can also use a plain, high-quality yogurt or a specific commercial starter like Suncore Bio products to kickstart the process.
The math is simple. A quart of heavy cream might cost you $5 to $7, but it can yield nearly a cup of high-quality, artisanal-style butter. Compared to the $8 or $9 you might pay for a small wedge of cultured butter at a specialty shop, the savings add up quickly.
How Do You Make Cultured Butter at Home?
The process involves three main stages: culturing the cream, churning the fat, and washing the butter. It requires minimal equipment but a lot of attention to temperature and timing.
Step 1: Culturing the Cream
First, you need to turn your cream into a fermented base. Pour your heavy cream into a glass jar or a clean container. Add your starter—this can be a tablespoon of a high-quality plain yogurt or a commercial starter culture. Cover the container loosely with a cloth or a lid that isn't airtight. Let it sit at room temperature (around 70°F to 75°F) for anywhere from 12 to 24 hours. You'll know it's ready when it develops a slightly thick, tangy aroma and a bit of a yellowish tint.
Don't rush this. If the room is cold, it might take longer. If it's too hot, you risk the cream turning sour rather than cultured. You want lactic acid development, not spoilage.
Step 2: The Churning Process
Once the cream is cultured, it's time to separate the fat from the buttermilk. You can use a stand mixer with a whisk attachment, a hand mixer, or even a specialized butter churn. If you're using a stand mixer, start on medium speed.
- Phase 1: The cream will whip into soft peaks.
- Phase 2: The peaks will become stiff and grainy.
- Phase 3: Suddenly, the fat will separate from the liquid (the buttermilk). This is the "break" point.
Once the butter solids have clumped together, stop the mixer immediately. You don't want to over-work it to the point where the fat becomes grainy or greasy.
Step 3: Washing the Butter
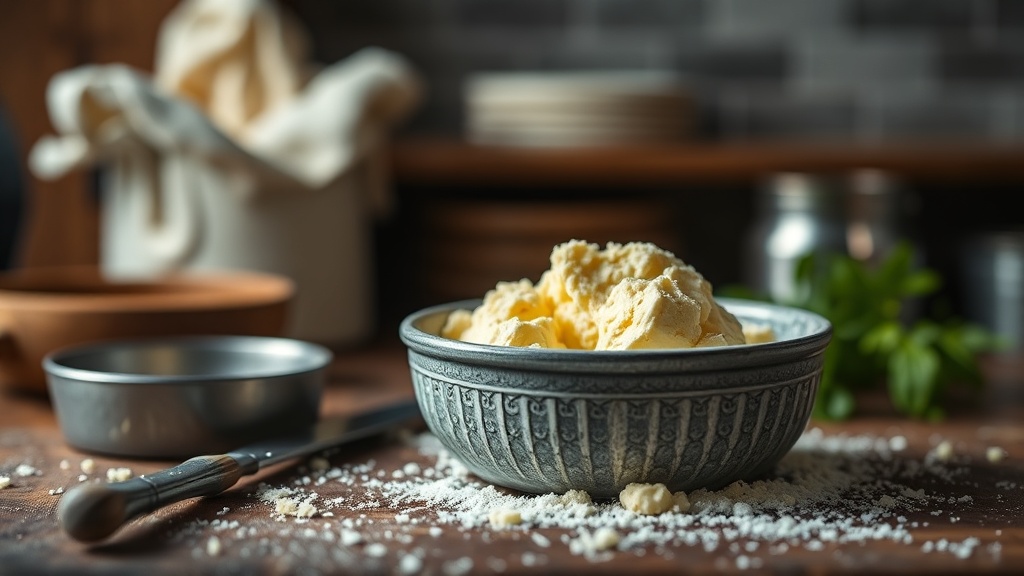
This is the part most people skip, and it's a mistake. You must wash the butter-fat to remove all traces of buttermilk. If you don't, the leftover buttermilk will cause the butter to spoil much faster. Pour the clumps of butter into a bowl and add ice-cold water. Use a spatula or your hands to gently press the butter against the bowl, squeezing out the liquid. The water will turn white as the buttermilk escapes. Keep adding fresh, cold water and squeezing until the water stays clear. This can take several rounds of washing.
A tip for the impatient: use water that is as cold as possible. It helps keep the fat solid while you're working it. If the butter feels too soft, pop it in the fridge for ten minutes before the final wash.
What Tools Do You Need for Success?
You don't need a laboratory, but a few specific items will make the process much smoother. Most of these are standard kitchen staples.
- High-Fat Heavy Cream: The higher the fat, the better the yield.
- Glass Jar or Container: For the fermentation stage.
- Stand Mixer or Hand Mixer: For the actual churning.
- Fine Mesh Strainer: To help separate the buttermilk during the washing phase.
- Cheesecloth: For an even more thorough rinse.
If you're looking to add flavor, this is where you can get creative. Once the butter is washed and slightly drained, you can fold in fresh herbs, garlic, or even a bit of sea salt. It's a great way to use up those spices in your pantry to create something truly custom.
One thing to watch out for is the temperature of your room during the culturing stage. If you're using a stand mixer, make sure the beaters are clean. Any residual egg or flour from a previous bake can interfere with the fermentation or even cause the cream to go bad. Cleanliness is everything here.
After the final wash, pat the butter dry with a paper towel. If you want to store it long-term, wrap it in parchment paper and then foil. It's best used within two weeks if kept in the refrigerator, though it can be frozen for a few months. If you're making a large batch, you might want to use it for a recipe like my One-Pan Creamy Garlic Parmesan Chicken to use up the extra richness. The depth of flavor you get from homemade cultured butter is a complete different experience than the stuff in the yellow tub.
Steps
- 1
Ferment the Cream
- 2
Churning the Cream
- 3
Washing the Butter
- 4
Seasoning and Storing